29 December 2009

27 December 2009

Monarch Nosferatu--PAINTING (I)

I had a spare hour or so this afternoon, so I decided to go ahead and get the spot-priming behind me. "Spot-priming" is what I call the select application of primer to suspected/known trouble areas. It's not something that, as figure modellers, we tend to do as a matter of course, but it is nonetheless an essential technique for most aspects of scale plastic modelling.

I use the G-S Mr. Surfacer primers for spot priming, due to their filling properties. In this instance, I used Mr. Surfacer 500 applied with an airbrush, with special attention being paid to the long lateral seams of the frock and the medial seams of the boots.

All in all, I was very pleased with the results. While flaws were indeed revealed (including one to which I didn't have a clue!), they were relatively few, and should be taken care of before calling it a night today.

If work isn't too bad, I will try to get the figure primed and on the paint bench by tomorrow evening. In any event, I should be applying the undercoat by this coming weekend.

FOLLOW-UP
The figure is now primed!!! I'll try to give it the final once-over over the next few days, and then post images of the primed piece.

28.12.09--UPDATE
The figure has been moved to the painting bench! I'll try to get images of the primed components posted by the weekend. Back to the hands!

Monarch Nosferatu--FINE


20 December 2009

Monarch Nosferatu (5): Final Finishing & Wrapping-up

I am very pleased to say that this will be the initial posting in the final bench thread of this project. Within the fortnight, I hope to have the painting thread underway.

It has been a productive couple of days. Final finishing is about 70% done: the arms have been permanently attached since Thursday, and I am now waiting for the putty to cure around the arm joins so that the sleeve seam can be finalized.

I also spent a productive hour or so on the hands today: I would say that they are about 60% done, and one or two more bench sessions should wrap them up nicely.

23.12.2009
Final surface finishing is now about 55% done. With any luck at all, I will be photographing the finished piece over the weekend in anticipation of priming.

24.12.2009
I have just permanently attached the neck peg and the leg pegs. . . the benchwork is virtually done! I am striving to complete all the remaining touch-ups, etc. by Saturday and shoot him on Sunday. Priming will have to wait until the following weekend as I will be tied-up at work all of next week. . .

26.12.2009--UPDATE
Nosferatu is all-but-done (save for the hands) as of about 20 minutes ago! I plan to photograph him tomorrow, so the final pre-priming images should be up by Monday latest.

19 December 2009

EPH IS BACK!!!!

Just a quick note to let you know that EPH is "back in business", as it were, and I--WE!!!--will hopefully be able to pick-up where we left off. In short, if you want to start posting on EPH, by all means do so, and rest assured that the site will be monitored at least daily. Please note that if you wish to make a posting on EPH, you will have to register as a member: Guests do not have posting privileges, though you may lurk at will and to your heart's content.

So what does this mean for AMF? Nothing whatsoever!!! AMF will continue, business as usual, as the venue of record for my non-historical pursuits. I apologize for any inconvenience caused to those who prefer one-stop surfing; but after considerable thought and deliberation, I felt that I was reaching fewer people with but a single venue than I could with two.

Before closing, there will be some projects that will bridge the two sites, much as there were when I started AMF earlier this year. Historical projects will be resumed/continued on EPH. In order to maintain a semblance of continuity between the threads, if not where they reside, I will put hot-links in place whenever necessary.
I hope to have the transition completed within 8-10 weeks.

Best regards,

Augie

18 December 2009

Holiday Greetings '09

Unlike previous years, the metro Atlanta area is experiencing weather befitting the season. It's been seasonably cold. . . and WET. Hard to believe we were in a severe drought less than six months ago--now I'm ready to sprout gills! Go figure!!!

"Go figure", indeed! Take some time for yourselves this Holiday Season, and plot out a new project; or make some inroads on an ongoing venture; or simply wrap-up that poor soul that has been desperately clamoring for completion!

But above all, enjoy whatever time you have with family and friends. We're 90% through the first decade of the 21st c., and it has been "interesting", to say the least. I don't believe there's any turning back, and a great unexplored wilderness lies before us. One step at a time. . .

So on this last weekend before the Holiday and on the penultimate weekend of 2009, I would like to take this opportunity to wish the readership a joyous, restful, peaceful--and productive!--Holiday Season; and a healthy, happy and prosperous New Year.

MERRY CHRISTMAS
HAPPY HANUKKAH
FELIZ NAVIDAD
BUON NATALE
FRÖLICHE WEINACHTEN
GOD JUL
JOYEUX NOËL
KURISUMASU OMEDETŌ
NOELINIZ KUTLU OLSUN
S'ROZHDESTVOM KRISTOVYM
SUNG TAN CHUK HA
WESOŁYCH ŚWIĄT BOŻEGO NARODZENIA

Augie

15 December 2009

Solomon Kane Movie- UPDATE

Back in May, I reported on the upcoming cinematic release of Solomon Kane. The fact that I am able to update that announcement bodes of good things to come. . .

12 December 2009

Monarch Nosferatu (4): Finishing the head and arms--UPDATE

I am on a good pace to finish--and put away!--the head tonight! Surface finishing has been completed, the right ear is done, and the left ear about 75% of the way there.

The left arm is all-but-done, with some minor trimming and polishing remaining. I would like to have the left arm permanently attached by the end of the weekend.

Finally, all the rats have been assembled: the kit-provided rats remind me more of long-nosed muskrats than rats, so I replaced them all--and added some--from the Aurora Customizing Monster sets. I know this will deviate from the scene upon which I am basing the figure, but they are a must for any number of reasons.

FOLLOW-UP
Best laid plans. . . On the plus side, the left arm is done and ready to be attached. I still have a bit more work to do on the left half of the frock in terms of undercutting and surface finishing, but it is approx. 85% done as I write. The downside is that, save for a few minor touch-ups that I took care of tonight, the remainder of work on the head will have to be done later today.

WEEKEND WRAP-UP
Picking-up from where I left off much earlier this morning, the head and the left arm are done: once cleaned, they will be ready to be put away and permanently attached, respectively. The right arm is all-but-done: some minor reduction and drapery issues, and then on to surface finishing and mounting.

Most of the work on the frock is now done, though I still have six buttons to take care of. I am hoping that by this time next weekend, the figure will be ready for priming.

UPDATE
Just to keep you abreast of the progress since the last posting, all the putty work (including the buttons!) save for that on the hands is now done. Clean-up and final finishing will begin in earnest tonight. While I don't think I will have the figure primed over the weekend, I am still on track to have it ready for priming before Monday.

Until next time. . .

Site Navigation (3) -- Search functionality

I have just added a Search app to the blog in the hope that it will make finding the information YOU need more accessible. If you can remember reading something here, but can't place the "thread" in which it was posted, this app might make for a more productive search.

It is located below/after the Subject Index.

Enjoy!

Augie

PS--Unlike our past experiences with resident search engines, this one truly works!

Doyusha 1/4 Date Masamune's suji kabuto

It appears as if Doyusha intends to continue their series of historical kabuto, with no less than three new releases. Only one dates from the Sengoku, and it purports to represent none other than Date Masamune's iconic "crescent moon kabuto". It is also significant that this is the first offering--that I am aware of--with a menpō.

So much for the good news. While the views of this kit at our disposal are limited, my initial impressions are not favourable. At the heart of my disappointment is the flattened shikoro. I thought I had seen every surviving period suji kabuto associated with Masamune, and not a single one has a shikoro remotely resembling the kit's. There are other issues as well, but this is the deal-breaker. I am delighted that Doyusha continues to expand the line--if only for the prospect of seeing some venerable old releases re-issued, but my enthusiasm will be rapidly quenched if they persist on this course.

08 December 2009

Monarch Nosferatu (4): Finishing the head and arms

The head is now just about done. I have generated A LOT of dust reworking the sleeping cap, and I am finally "OK" with what is before me, though not quite there yet. . . In the interim I have roughed-in the right eyebrow: both eyebrows now await the final enhancements with ProCreate putty.

11.12.2009--UPDATE
Save for the ears, and the wispy, untamed strands of hair on the eyebrows and at the temples. . . THE HEAD IS DONE!!!

06 December 2009

Monarch Nosferatu -- Graphic Interlude

With the legs permanently attached, and work completed from the hem of the frock down, I now present you with the first images of this "conversion". . .


The next areas to be addressed will be the head and the arms, in that order. Once these are done, it should take no more than a few days to finish the frock, and then begin the pre-priming ritual. The hands and the keys will be worked-on while the figure is on the painting bench.

Stay tuned. . .

A~

05 December 2009

Michael Scarborough on Bases & Presentation

I am pleased to say that we have been joined recently by Michael Scarborough (see comments in the Art of the Samurai Exhibition posting). Again, WELCOME, sir!

Michael alluded to an article he had recently penned, and I happened to find it available on-line:

http://www.michaelscarboroughdesign.com/images/about_page/historical_miniature.pdf

Well worth a look!

Augie

28 November 2009

Monarch Nosferatu (3): The Return

With the Thanksgiving holidays behind us, and the end of another year looming ever larger, the time has come to take stock of what's on the workbench, remove the distractions, and begin to plot-out what lies ahead. . .

As the Wolf Man (save for the trap and reworking the hands and feet) is in the final stages of finishing), it was time to play some catch-up with Nosferatu. As is oft the case, I was pleasantly surprised to see that he was much further along than I had previously thought: still loads to do; but more at refinement than actual reworking.

This afternoon I have all but finished the arms, continued work on the drapery of the frock, and set the eyes. Tomorrow, I will hopefully have time to effectively conclude the work on the legs and lay-out the strategy for the keys.

More to follow. . .

29.11.2009--FOLLOW-UP
The left leg is now all-but-done; the right leg about 80% there. The underside of the frock (i.e., the attachment plate for the legs) has now been cleaned and finished and awaiting its "dependents". By the end of the week, I should have the legs permanently attached and the rest of the figure undergoing final finishing. FOLLOW-UP (2): I have begun preparing the leg sockets to accept their permanent residents: all that remains to be done on the legs is the surface finishing. The head is just about at the final finishing stage as well.

Images to follow once the legs are permanently attached.

Moving right along. . .

03.12.2009--UPDATE
With two dozen buttons to make--or rather, enhance--I decided to tackle the tedium in 3 lots of eight. The first lot is now curing. . . one down, two to go. . .

04.12.2009--UPDATE (2)
Two down, one to go. . . In what I hope will be a productive weekend, I have the legs and the preliminary once-over slated for tomorrow. If all goes as planned, I hope to spend some time with the camera on Sunday so that there will be ip pics up by Monday.

Back to the bench. . .

21 November 2009

"Open Channel D". . .

The pace at work is rapidly increasing as the November holidays draw nigh, and time at the bench is lamentably the first casualty. Nevertheless, I've been able to eke out small blocks of time here and there, and here is where the Illya project currently stands:
  • Pose locked-in; pants have begun to be "fleshed" out. Reduction of lower pant legs to accommodate boots begun as well.
  • Length of torso reduced to scale (~90%), as well as the length of the left forearm.
  • Wrist sockets ground-out on both forearms.
  • All sub-assemblies now pegged with 1/8" tin solder.
  • Re-sculpting of head has begun in earnest. To date, I have scaled the head (80%), reshaped the frontal area of the skull (60%), and have begun to work the chin and lips.
This will be it for a while as tomorrow I will resume the finishing work on Nosferatu and the Wolf Man.

23.11.2009--UPDATE
The head is now approximately 45% done. I am absolutely delighted with the progress, and even at this early stage, it is recognizable as David McCallum--at least to me. I still have a bit more to go (mainly the hair) before posting ip images.

27.11.2009--UPDATE (2)
First of all, I hope everybody who observes the holiday had a Happy Thanksgiving! Not much of a break given a late Wednesday at and an early Friday return to work, but at least I can look forward to leftovers in the days ahead!

But I digress. . . just a brief update to report that the head is now approximately 2/3 done! I did some refining work with the #12 blade tonight, but the major accomplishment was the addition of the lower eyelids. As most of you know, I've long ceased to place the eyeball and models the eyelids around the orbs: my preferred approach is to model and finish the eyelids, and then simply "fill the void". Much less stressful and MUCH more effective. FOLLOW-UP: The head has been located and fixed (but still removable), as has the torso to the legs, and that concludes PHASE 1 of this project. Once the putty cures, the subassemblies will be boxed and set aside to make room for Nossie and the Wolf Man. . .

"Channel D. . . Out. . . "

09 November 2009

U.N.C.L.E. meets Bond

Background (the short version).
I recently discovered NCIS, and it has quickly become one of my TV-viewing faves. Of course, seeing David McCallum, spry as ever at 76(!), as the NCIS Chief ME, Dr. Donald "Ducky" Mallard, got me reminiscing about the halcyon days of TV in the '60s; and from 1964-68, The Man from U.N.C.L.E. was a must-watch series. For those "youngsters" in the readership, David McCallum played U.N.C.L.E. agent Illya Kuryakin in this TV-spinoff of the Bond movies (NOTE: Ian Fleming, in fact, had a hand in the creation of the U.N.C.L.E. series, and the characters of Napoleon Solo and April Dancer (eventually the "Girl from U.N.C.L.E."), if only in name, were created by him.).

The Project
This will be a long-term project to savor and enjoy, so check back periodically to see what progress is being made.

That being said, let's take a peek at what lies ahead. . .

As I mentioned above, this project began with seeing David McCallum in NCIS. This led to reacquainting myself with the U.N.C.L.E. series, and taking a mental trip down memory lane. I never had the Aurora Man from U.N.C.L.E. offerings (more on these later)--by that time I was already into the planes and cars phase of the modelling "bug"; but I did have the Marx U.N.C.L.E. set of vinyl figures. If memory serves, these were about 6" tall--give or take, and I began contemplating cutting a mold and casting resin copies that could be reworked as necessary. A lot of work for what would be essentially a resin knock-off. Pass.

The Aurora Man from U.N.C.L.E. offerings (NB: 1/12th scale, slightly smaller than the Aurora norm to accommodate the expansive scenic bases; cf., Spiderman, Dick Tracy, Bond[???])--Illya and Napoleon Solo--are hard to come by, and prohibitively expensive when found. These are purely collectible/fan "grails" as the sculpts/castings left much to be desired: I might have enjoyed them as a pre-teen, but certainly not now. Still. . .

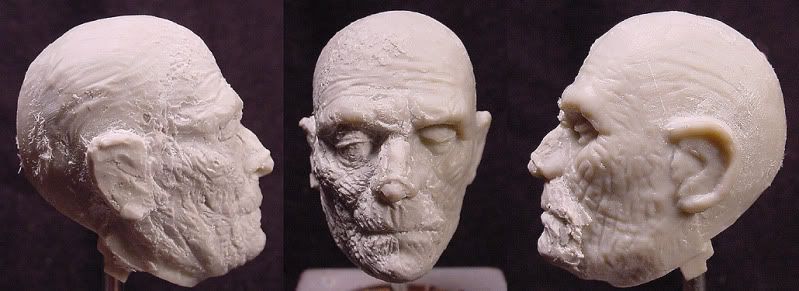
The Illya kit depicted the U.N.C.L.E. agent in his trademark black turtle/polo neck sweater crouched by a garden wall behind a square lamp post with lantern. . . Was Aurora trying to hide something? Nevertheless, it got me thinking: was there a suitable 1/8-scale kit that could be converted into Illya?

And the answer is a resounding, YES! An original Aurora James Bond is arguably as difficult, if not more so, to find than his U.N.C.L.E. cousins (and if I am not mistaken, as alluded to above, designed in 1/12th scale as well--can anyone confirm this?); but the decade-old Polar Lights "1/8th scale" reissue is not. In fact, they can be readily found for around US$20-25, and if you look hard enough and are patient, they can be had for less than $10!

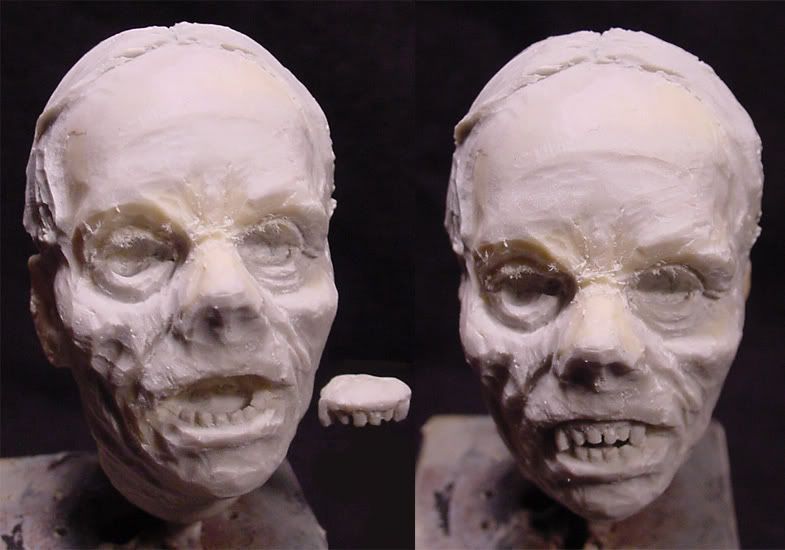
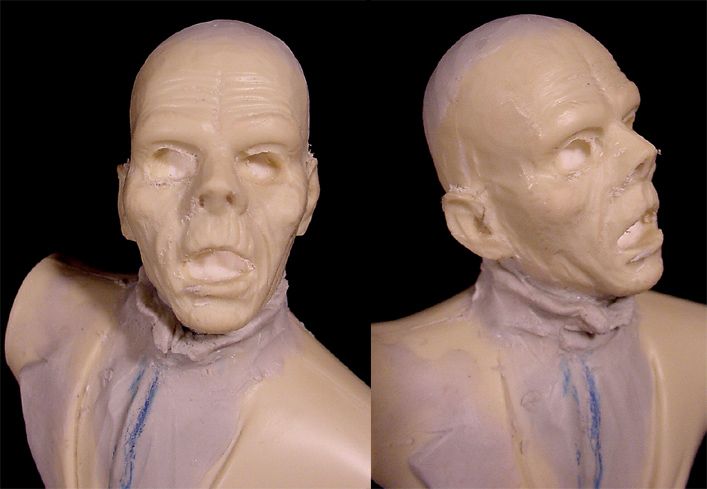
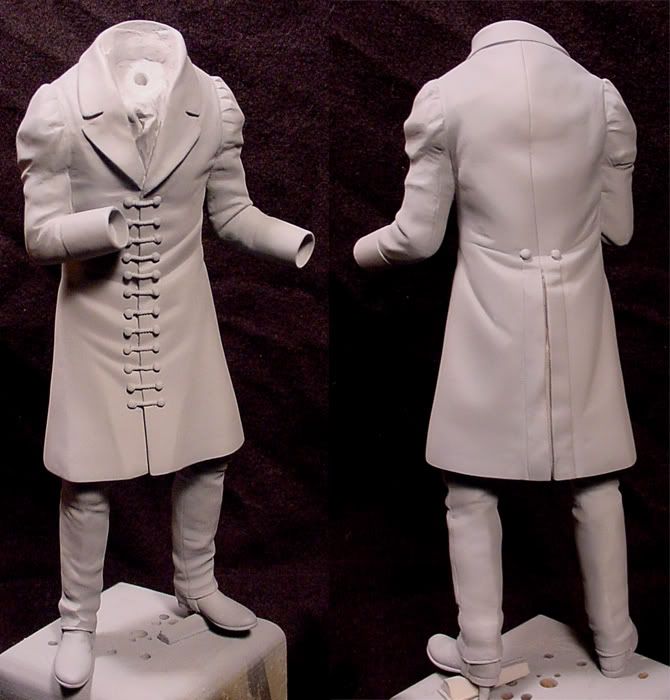
And this is how the offspring of Ian Fleming's fertile imagination came to meet. The Bond kit (scales out at 1/9th scale/200mm) captures the essence of the Kuryakin kit in a much more viewer-friendly pose and setting. On the agenda for now is a new head and weapon (I'm very much looking forward to the latter!), and the addition of a shoulder holster. I'm sure there will be other mods and tweaks before it is all said and done, but this is a good start.

PS--All subassemblies (including the base/groundwork), save for the arms, are now glued and rubber-banded.
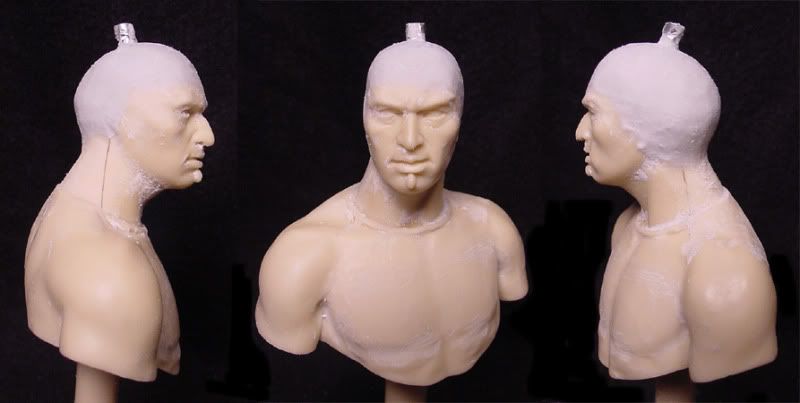
11.11.2009
The lower body (i.e., assembled legs) and the head have been filled with PUR. Regarding the latter, I created a neck extension with a clay dam prior to pouring and I now have a neck--actually the core of a neck--with which to "play around" and optimize the position of the head. As a closing note, the arms have now been assembled.

13.11.2009
I had put the kit away yesterday to attend to more pressing mundane matters, as well as ward off vexing distractions; but a couple of hours of "down time" became available late last night, and I tried to make the most of it. . .

The balance of the kit is now PUR filled. I also began to pare down the bulk of the sweater, and reduce the shoulder extensions on the torso. The latter prompted me to prep the left arm (bisected at the elbow and pegged with 1/8" tin solder) for future repositioning.

All in all a productive 90 or so minutes. I may work a bit more on this over the weekend, but Nosferatu and the Wolf Man will not wait much longer. . . tempus fugit! UPDATE: The right leg has been repositioned to depict a more believable--and sustainable!--crouch: this simply involved removing a wedge from the back of the knee. Naturally, the right foot had to be removed and repositioned as well. Since the stylish loafers will be replaced with leather combat boots, I could concern myself more with the ultimate position of the foot rather than preserving the stock footwear. UPDATE (2): With a few hours to spare this Saturday morning before having to go to work, I reduced the length of the torso and began "playing" with the pose of the figure.

08 November 2009

Art of the Samurai Exhibition

Art of the Samurai: Japanese Arms and Armor, 1156–1868 is now open at the Metropolitan Museum of Art in NYC (21 October 2009–10 January 2010). Of greater relevance to those of us who will miss this exhibition, highlights of the exhibition are now available online at the Met site; and the catalog for the exhibition is also now available for purchase.

There are some undeniable treasures to be seen at this unique event; however, if I have under- stood the annotations correctly, one would have to visit the exhibit at least twice to get the "full" version. For example, according to the MMA site, Honda's "antlered" gusoku is on display through the 29th of this month; but the ni-mai dō of Sakakibara Yasumasa will not be on display until Dec. 8th.

While there is nothing like viewing the items "in the metal", unless one is in close proximity to the Big Apple, the catalog would seem to be the option of choice.

22 October 2009

iHobbyExpo News!

iHobbyExpo, the US's mega trade show for the hobby world, is taking place in Chicago as I write, and the first day has yielded some interesting--even exciting--news!

Revell/Monogram will be reissuing Aurora's Red Knight of Vienna and Black Knight of Nürnberg, as well as re-releasing the Creature from the Black Lagoon: the latter appears to have had the prominent(!!!) lateral step across the top of the head finally addressed. These are currently scheduled for the first half of 2010.

Moebius had any number of surprising announcements: noteworthy, at least to me, were the re-release of Aurora's mounted Confederate Raider and an all-new Bela Lugosi Dracula. The latter (due late 2010) ought to be VERY interesting. . . [FOLLOW-UP: The Moebius rendition will be based on the stage version of the Count, with full approval of the Lugosi estate, thus avoiding the potentially stigmatic Universal involvement. For those who are wondering about a conversion to the silver-screen rendition, if memory serves this should be well within the capabilities of any modeler beyond the entry-level.]

Full report can be found here.

21 October 2009

"Tzitzimitl" - Intermezzo (cont.)

To pick-up where I left off in my update of 10/19. . .
  1. I have further "refined" (read: reduced) the girth of the pedestal, and it is now ready for finishing--providing I do not elect to alter the current pose of the bust.
  2. The salient cylinder of the right ear spool is now finished. Detailing and final shaping of the mandible has begun.
  3. And after tweaking the facial landscape more to my liking--nothing major I assure you--I have permanently, though as yet not irreversibly, attached the m-h to the head. . .
LET THE FINISHING BEGIN!!!!

17 October 2009

QUESTIONS

As a result of the recent fruitful exchange between Ric and myself, I decided to create this open thread that will allow--and hopefully encourage--the readership to ask questions related to what we do. Depending on the response and/or the number of postings, I will periodically close a thread and open a new one (e.g., QUESTIONS 2, 3, 4, etc.) Far from perfect, I know, but it will hopefully prove useful.

Remember that your inquiry will be posted as a "comment" to this introductory blurb. And, regrettably, there is no html allowed in the comments. If you would like to illustrate a particular point, feel free to email me the jpg, and I will use it to formulate my answer.

Fire away!

Augie

"Tzitzimitl" - Intermezzo

As I am fast approaching commencing the finishing phase of the project, it was time to reassess the work to date. . . and all was not right.

Most of the "issues" revolve around the m-h and the head. In short, I should have removed the head at the outset and worked the project in two distinct subassemblies, as opposed to a single main structure with accessory items. To this end, I have now removed the head (at the neck), will permanently attach the head within the m-h, and model all the interior details of the m-h, most of which will now be accessible. This will also allow me to reposition the head to its most effective pose vis-à-vis the enhanced m-h, rather than adapt (or accept) the original pose.

Some of you will immediately FF to the fact that I will not have free access to a bare head while painting, and you would be correct. But this is no big deal. In fact, it will mean less to paint, and only those structures that will remain visible will have to be painted.

17.10.2009--UPDATE
I have finished reworking the neck and the corresponding socket; and the collar has been reworked and the first of the tlahuiztli ties (the tlahuiztli as an open-backed garment was closed with 3-5 ties) has been roughed-in. I can deal with these sorts of "setbacks" . Final finishing will hopefully be underway by next weekend.

18.10.2009
The second of the visible ties has now been roughed-in, and detailing work has begun along the collar. I have also roughed-in the left ear spool on the m-h. I should be able to permanently join head and m-h in the next 24-48 hrs. The next major installment will address the undersides of the bust and addition of the pedestal.

19.10.2009
The pedestal is now about 80% done. . . which means roughed-in, with finishing well underway. I will probably hold-off final finishing and polishing until the project is all-but-done, as I might have to reassess the pose once the h-m panache is in place: quetzal feathers can easily throw a figure "off-balance", esthetically, if not literally. And. . . the "back" of the left ear spool is now done, with the right ear spool roughed-in. Slowly, but surely. . .

13 October 2009

E-mails & Comments

I would like to thank all of you who have taken time to visit the site and have sent an email with your comments, questions, etc.

While I am more than happy to answer any and all questions--time permitting, I have to ask myself, "Why not post a comment where everyone can benefit from the exchange of information?"

You might have your reasons, and that is fine. And I can certainly understand in some instances as the content of the email might stray to what might be considered "personal". Having said that, if it is a question, comment, observation, etc. dealing with what we do, then by all means please consider posting it on the blog.

Admittedly this is a somewhat limited platform for the types of exchanges that we are used to elsewhere; but if you think about it, not that limited. . .

Before closing, please remember that if you decide to take the plunge, all comments are under full moderation, thus your posting might not appear for 24 hrs., depending on the circumstances.

And with that. . . keep 'em coming. . . and THANKS!

Augie

11 October 2009

"Tzitzimitl" - Phase II: The Torso

Those of you who have been following this project will know that the first step is to model the ichcahuipilli, which will be applied in two pieces, poncho-style. Normally, I would quilt the garment, but since it will be all-but-hidden from view by the tlahuiztli (overall), my primary goal is to add the necessary volume to the torso.


The torso is now curing in the oven. The next step will be to cover the arms with the sleeves of the tlahuiztli, and add the integrating drapery.

12.10.2009
The sleeves and collar of the tlahuiztli have been roughed-in. I have now commenced working on the drapery and surface finishing.

13.10.2009
This evening, I attempted to model the padding on the inside of the m-h while still retaining the stand-alone capability of the same, but it is simply not possible. Thus, the visible padding will be modelled and painted in situ once the m-h is permanently attached. I did, however, successfully restore the fringe/bangs on the forehead of the subject.

14.10.2009
The reconfiguration of the h-m has begun in earnest. I am trying to take it slow and easy in anticipation of the receipt of the MdT, although this invaluable reference will not come into its own until it comes time to surface detail the tlahuiztli and break out the paints. However frustrating working the h-m might be, it is also the part of the project I enjoy the most.

More to follow. . .

"Tzitzimitl" - Phase I: The Mask-Helmet -- GRAPHICS


10 October 2009

"Tzitzimitl" - Phase I: The Mask-Helmet

The tzitzimitl mask-helmet (hereafter, m-h) is as defining as it is iconic, thus it stands to reason that it has to be "right". It not only has to be right (i.e., display the characteristic appointments that were associated with the deity); but it has to look right when worn... This is as good a time as any to underscore that the Mexica "mask-helmets" were full helmets, "great helmets" if you will: the way Young has designed the helmet suggests, at least to me, that this was more of an open-backed mask than a helmet.

I spent a couple of productive hours at the bench yesterday, and the m-h makeover is well underway. I'll post some images in the next 72 hrs., but in the meantime, let me touch upon some highlights of what's been done to date.

1) I have reduced the necklace (which will serve nicely as the edge of the collar of the tlahuiztli), and eliminated the claw-like spacers--I have no idea what these are intended to represent. This served as a preliminary to the initial judicious reduction of the pectorals: so far I would say I have reduced them by 1-1.5mm. I may go a bit further, I may not. To prepare for what follows, I permanently attached the face/neck, and reduced all visible hair.

2) Eliminated the mantling of feathers across the shoulders, and the bindings, etc. on the back of the head. The tzitzimitl m-h does have a quetzal-feather crest attached to the top of the m-h; and the back of the helmet is adorned with hair and/or quetzal feathers arranged to look like disheveled hair. Some sources indicate that the entire m-h was covered with featherwork, and this will be examined and considered in the days to come.

3) Eliminated the fangs. It might look "cool" and "horrific", but we're talking about a flesh-eating, skull-headed demon: what more do you need?! Fangs were limited to mask-helmets depicting natural creatures (e.g., jaguars (ocelotl), coyotes (coyotl)). The same may be said of pronounced "overbites", where the mandible of the h-m is markedly underslung relative to the maxilla.

4) The talon ear-pendants and the carved "forelock", for lack of a better term, have already been discarded. The former will be replaced by the characteristic ear spools of the tzitzimitl: to accommodate these, I have drilled a 3.5mm hole in the ear lobes of the m-h's ears. But before that is given its due consideration, the ears must be relocated: to this end, they have already been removed.

ADDENDUM
A most productive day! I have restored the calvarium to the head, and the h-m is now a stand-alone, removable item. Next I will fit the h-m by adding the internal padding. I have not decided whether I will depict the h-m ties (omitted in the kit) tied or un-.

11.10.2009
The ears on the h-m have been reattached. I have begun the surface finishing on the m-h, and started tweaking the overall shape in anticipation of the addition of the shell (forehead) and the hair/feathers.

03 October 2009

Where did September go?

A brief catch-up posting that will hopefully mark a turn for a semblance of normalcy, if not the better all around.

September was pretty much a write-off. Between the historic floods that slammed the metro Atlanta area and attendant home repairs; being laid-up with the "Flu from Hell" (no, I did not get a flu shot; nor was there enough time to get any of the post-exposure anti-virals-- no regrets on either count!), something that I am still working my way through; AND dealing with Q3 end at work, the ninth month was effectively deep-sixed!

Which brings us to the beginning of the last quarter of 2009. Traditionally this is a relatively unproductive period due to holidays and work. Hopefully, I'll be able to make this year an exception and get things off the workbench and on to the painting table by the Christmas holidays.

In the meantime, however, there remains MUCH to be done. . . hope you'll drop by often to check on the progress.

Best regards,

Augie

01 October 2009

"Tzitzimitl" - Planning

With the excellent graphic breakdown of the kit presented here, planning can begin in earnest.

The first order of business will be to reduce and "dress" the torso. I've always had a problem with the "ripped" physique usually found on indigenous subjects; hence the initial reduction. I would say that the necklace and the sculpted feathers on the torso will have to be removed as well, but this might be taken care of by. . .

the modelling of the ichcahuipilli, the stuffed and quilted vest that was the "foundation" piece of defensive wear around which the Mexica garniture was assembled. While not all warriors went armoured, all armoured warriors wore an ichcahuipilli as the tlahuiztli did not possess any defensive properties beyond what a sturdy denim overall would provide.

I will add to this thread over the following days. . .

07.10.2009

Mine arrived today! For whatever it's worth, Young continues to provide the best and most stylish packaging in the business. And in case anyone is wondering, there is no refsheet of any sort included with the kit. . . Regardless, I have now requested the facsimile edition of the Codex Moctezuma (bka the MdT) through ILL. . .

10 September 2009

Monarch Nosferatu -- UPDATE

Hard to believe that it has been nigh unto a fortnight since I last posted anything. . .

Fortunately, that does not mean that things have been idle on the bench, though regrettably progress has been somewhat limited.

Most of the putty work is now done, with but a few areas still demanding additional attention. I have begun clean-up of the seams, and I would say I am about 60% done at this point. The key(s) are on the agenda for next week, though I suspect that this aspect of the project will not be completed until the figure has long been transferred to the painting bench. I have done but two of the buttons. . . saving the worst for last.

Hopefully things will resume a semblance of normalcy after month's end; but in the meantime, rest assured that progress will continue--painting "season" is fast approaching!

26 August 2009

Monarch Nosferatu (2)

Things are moving right along, and I am now working on the upper torso, namely the arms.

The right arm is all but done. Little work to be done save for a slight repositioning at the shoulder (lowered) and elbow (forearm raised and rotated into body). The shoulder joint is now finished.

The left arm will take considerably more work. The arm will essentially mirror the right, while the forearm will swing slightly away from the body, gesturing. The arm has already been sectioned mid-bicep, and has been tentatively "assembled", now awaiting final positioning.

Modifications to the left hand have already begun. The right hand will remain essentially stock though it will be reworked and redetailed as called for.

That's about it for now. Images will follow sometime next week: I don't want to lose the momentum, and things are somewhat hairy at work with month-end coming up.

27.08.2009
A flurry of activity in anticipation of the weekend. . .

The left arm is now completely roughed-in and positioned. With the leftover MS, I began to rough-out the collar build-up. The collar appears to be the lynchpin article in this project: the difference is striking!

30.08.2009
"Best laid plans. . . " and all that. This weekend got kiboshed by end-of-month work 'stuff', so time at the bench was all but eliminated. Still. . . the two arms are now all-but-done (NOTE: there was a bit more work than anticipated on the right arm--all good). And the mods to the upper torso--save for the cravat--are all roughed in.

All that really remains to be done are the keys, the cravat, the buttons (all 26 of them), and the pleats on the back of the frock.

Gettin' there. . .

22 August 2009

Monarch Nosferatu--Intermezzo: The Keys

With the head all but done; and the legs reduced, roughed-in and re-positioned, I am now able to get a preview of what the final piece will look like. Still rough, but a preview nonetheless.

This revealed a shortcoming that some might consider relatively minor, but which I feel limits the presence and atmosphere of the piece: namely, the keys. Kudos to Monarch for providing [seven] individually- and finely-cast keys (!); the problem revolves around the fact that they are all the same size--and undersized at that. Thus, they all fit perfectly on the "key ring", giving one the impression of an orderly janitor/building superintendent who took it upon himself to re-key all the locks!

I have been unable to shake this latter image for about a week, and I finally decided that I would rework the keys. I have yet to do the first key (there will be between seven and ten), so I don't know if I am going to do each one individually; or if I will make a master key, put it into rubber, and cast the required number of copies. Unless it is inordinately time-consuming (or boring!), I will attempt the former approach.

More to follow. . .

13 August 2009

Monarch Nosferatu

I've been playing with this one since I received it (Monday), and all the subassemblies have been assembled and the working-out has begun. To date, this has been an absolute joy, and it would receive my most emphatic and enthusiastic recommendation as a first-kit for anyone who wants to experience a little of what it was/is to be a "Monster-Kid"!


15.08.2009
To date. . .

As I mentioned, the subassemblies have been completed since Thursday, and I have been playing with the pose since then. Not exactly the easiest thing in the world considering the piece is hollow, but a few things were revealed--most importantly, the right leg is significantly longer than the left! This is easy enough to fix, whichever way one chooses to go about it.

With that done, the next step was filling the subassemblies with PUR. Once that was done, I drilled and pegged the legs and boots. Now any repositioning can be done with a fair degree of certainty. The repositioning of the legs will be relatively minor; the arms, quite the contrary!

18.08.2009
A few 'bites by way of progress made. The head is now well underway. The main enhancement has been the addition of the sleeping cap. This is turning into quite the project as there are limited views of the item in question. Thankfully, my experience with sculpting Renaissance headwear will come in very handy.

With the cap blocked-in, it was time to start reworking the face. First step: removing the ears. Next step was fleshing out the face a bit more. Save for his nose, Shreck's actual face was enhanced relatively little for his early scenes, hence it is more of a straight embellishment of portraiture.

Finally, with the left over putty, I began to enhance the "hump". This will lead to a more natural relocation of the arms and achieving the characteristic "no neck", hunchbacked look of Orlok.

22.08.2009
Much has been accomplished in the last four days. The head is now all but done. More importantly, the legs have been entirely reworked and repositioned.

Monarch is to be applauded for their design of the legs/feet: the boots fit into a cuff recess of the pant leg, providing not only a positive fit which still allows for some minor adjustment by the modeller if deemed necessary; but creates a convincing undercut. The problem lies in that the pant legs are stirruped and the stirrups are attached to. . . what? The second problem is that the essentially featureless legs are significantly and noticeably roomy--think tuxedo trousers.

I thought I could solve the problem by stovepiping the distal portion of the legs and introducing some much needed "landscaping" (i.e., drapery). By the time I was half-way through the reduction of the right leg, I had broken-through to the PUR filler in so many places that I decided to strip away the polystyrene shell completely. . .

Now I have two replacement legs made of PUR. While I will have to essentially resculpt both legs (reduce and "landscape" the PUR cores), the end result will be a significant improvement over the stock items.

That just about wraps-it up for this installment. As a sidebar note, these are enhancements and modifications that I feel are necessary to realize my vision of this subject: OOB, this would be a worthy addition to ANY collection.

09 August 2009

"Bride's head Revisited"

After a somewhat less-than-sure start, I can see the light at the end of the tunnel! The face is now about 85% done and I couldn't be more pleased!!

As anyone who has attempted a likeness of Elsa Lanchester knows, this is advanced portraiture! Few if any of the commercial likeness truly do her justice: most appear to rely on one one or two trademark features to carry the day. In her role as the Bride, this is usually pared down to her hairdo and her eyes and/or full lips. But while these provide three of the four critical anchors for the exercise, they alone will not provide a convincing likeness.

I hope to be able to post images of the all-but-completed face by week's end. If all proceeds as planned, all that will remain to finish the head will be reworking the hairdo. It is the tousled fullness of the latter that provides the keystone to the alluring beauty that it frames.

07 August 2009

The week of 8/3. . .

1) "Bride's head Revisited". I can't take credit for this brilliant pun: dear friend and colleague--and lurker!--Rich cracked me up with this inspired comment in an email today. But yes, the work on the BoF's head progresses, and I believe I'm just about at the turning point of the exercise. I'll know more in a few hours. I'll try to get photos up in the next week or so. . .

2) After much going back and forth, I broke down and ordered Monarch's 1/8th scale Nosferatu. This kit has been the rave of the Aurora-philes and has been touted as the "true" successor of the Aurora Monsters series. Personally, I don't know if this is a compliment or not; but the kit has obvious potential, and since it appears that it may not be readily available for much longer (and prices for the original release are already beyond the 100% markup), I decided to add it to the styrene army.

PS--Item received today (10/08/09). With the collectible glamour firmly in place in the original release, I went for the "Frightening Lightning" glow-in-the-dark version of the kit. And why wouldn't I? No, I never liked the glow-in-the-dark versions of ANY kit. . . (collective gasp), BUT in this instance, one gets a full kit with select duplicate parts in glow-styrene. The best of both worlds AND an at-hand supply of spare parts! Full review to follow in the days to come. . .

3) Ordered Sideshow Collectibles' second rendition of Schlitzie the Pinhead from the Tod Browning classic, Freaks (1932). This is a long OP kit (released in 1998) that is a classic in GK-dom. Of the two, this is a vastly superior likeness of this gentle soul.

PS--Item received today (08/08/09). Though the casting as a whole was somewhat less than I had anticipated, my experience with bonded porcelain/marble should make short work of most of the shortcomings. All in all, I am very pleased and very happy to add this piece to my collection. Once the corrections and touch-ups are completed, this will be my first selection for a pure painting project.

4) Dusted off (literally!) my IP, 1/10 portrait bust of Filippo Buondelmonte degli Scolari, better known as "Pippo Spano". The historical midges are beginning to swarm and this is a near-perfect subject to bridge my current interests.

And that wraps it up for what has been a trying and draining fortnight. Hopefully things will normalize soon, and I can return to regular sessions at the bench.

01 August 2009

Dark Horse 1/8 Bride of Frankenstein

The so-called Bride of Frankenstein--as we all know she was intended to be the mate of the Monster--is one of my favorite Universal Monster characters. It is certainly my favorite of the Universal Monster films of the "Golden Age".

I already have GEOmetric's 1/4 scale bust of the Bride in-progress on the bench. Yet ever since I decided to immerse myself in my own version of a "Monster-Fest", I've been looking for a full-figure of the Bride. Yes, of course I have the Aurora classic (the PL reissue); but I was looking for a gowned Bride. The Horizon piece I don't care for at all; the Billiken offering, while arguably the best likeness of Elsa Lanchester, also doesn't do much for me, which is just as well as it damn near impossible to find and priced as a collectible. That leaves but one in 1/8th scale or larger: plainly, the full-figure selection is slim, and I, in fact, had resigned myself not to have a full-figure of the Bride in my "portfolio".

The other day I stumbled upon the opportunity to acquire a MIB Dark Horse 1/8 BoF cast in bonded (cold-cast) porcelain. In total candor, I like this kit little more than the ones mentioned above. But as the subject is not likely to be redone--and even if it were, who knows what would be foisted upon us--I decided to take the plunge after considerable deliberation, not lightly influenced by the most generous asking price.


So, what do we get for our money? Nothing less than a superbly cast, meticulously packaged figure comprised of 9 cold-cast porcelain pieces: 4 for the figure; 5 for the scenic groundwork (which will not be incorporated in my rendering). A couple of observations if I may: 1) The one-piece body is hollow/roto cast! This zero-compromise weight- and medium-saving measure is to be applauded; however, securing the figure to the base may prove problematic. And 2) Based on the Aurora-like instruction leaflet, this figure was originally [to be] produced in vinyl: I was not aware of any vinyl DH products.

And now for the subject of this kit. As I mentioned above, I do not particularly like this kit. Why? Very simply, the head/face is a very poor likeness of the subject. The sculptor, Michael Trcic, is an extremely talented artist with solid Hollywood credentials, so he was either off his game; this is really not his cup of tea; or the licensors (Universal) ensured that the likeness was off. The presence of jagged, broken dentition suggests the latter. In any case, I am currently remodelling the face with the goal of achieving a recognizable likeness of Ms. Lanchester.

Back to the bench!

03.08.2009

PS--I failed to mention that there is another aspect of this kit that might put some miniaturists off: the gown has an uneven grainy texture. I can't imagine that this surface texture was reproduced in vinyl IF this kit was ever released in that medium. I suspect that this was added to aid with the drybrushing of the kit: a "white" gown (I'll call it "white" for now) in this scale with a smooth surface and convoluted drapery would be a deal-breaker for most miniaturists of the genre. In any case, annoying yes, but if I can't find a way to work work around it, it will remain. UPDATE--I have begun to reduce the surface texture as, no matter how I attempted to rationalize its presence, there was no way it could be painted around. My approach will be broad-to-specific: I intend to begin with a general surface clean-up, followed by dividing the gown into 1-2" squares, and finishing each square in an orderly fashion. Once I get the overall texture reduced to a manageable relief, I will probably resurface the entire gown with glazing putty prior to the final finishing sanding. Stay tuned. . .

14.08.2009

If you are ever faced with having to surface-finish a heavily contoured surface, you can do no better than doing your gross reduction with Scotch-Brite's Heavy Duty Hand Pad #7440. I was beginning to doubt whether I could ever get the surface of the gown reduced to even a reasonable smoothness when I ran across the aforementioned product. Impregnated with a medium-grit AlOx abrasive, this will mitigate much of the pain and frustration of removing all the ill-conceived texture. My only caveat would be go slowly: this will remove A LOT if one is not careful!

Back to the bench!

25 July 2009

Horizon 1/6 Frankenstein Monster

What would a "classic" Monster collection be without a full figure of the creature that to many started it all, the iconic image of a--if not THE--Hollywood monster?

Up until 2-3 weeks ago, my designated choice for the Frankenstein Monster project had been Moebius' 1/8 scale forthcoming release. I'll not agitate the hornet's nest on this site--enough of that going on on any number of other discussion forums; but I will say that this piece is a crushing disappointment. I was resigned and prepared to resculpt the head, but to do this piece justice would require virtually an entire resculpt! I've already embarked on one of those projects (the Wolf Man) simply because there were no reasonable alternatives, and I did have a unique presentation in mind. To resculpt an entire figure that [allegedly] had been rushed into production(?) in order to correct the obvious shortcomings of its design is not my idea of a fun time at the bench!

Before going on, let me just interject that there is only one Monster for me--the Karloff Monster. Karloff had numerous opportunities to reprise his role after SoF, but he chose not to. If for no other reason than to honour this laudable declination, Karloff--and no other--IS the Monster.

So. . . where would I find an available, affordable, and acceptable Monster? Unfortunately, neither of the two items on the list is in production; and if you can find one, they are priced as collectibles. Fortunately, a dear friend had a MIB Horizon Frankenstein Monster stashed away, and after we both finally got over what Moebius accepted and Universal had approved/demanded?, he offered me the Horizon kit without hesitation. That kit is now before me.

Cast in 7 pieces in the familiar light grey vinyl, this is a typical Horizon kit; i.e., a G+/VG- vinyl kit. The vinyl is somewhat "light" and the wall thickness relatively thin; hence, distortion (not readily apparent) and compromised fit will have to be dealt with from the outset. Another consequence of the medium and how it was cast is the proliferation of air bubbles: virtually every piece will require some degree of corrective work to deal with these.

That being said, this is one of the best representations of the Karloff Monster ever produced, being sculpted by the talented Steve Wang. Some argue that the Billiken Monster is marginally better: I've only seen the Billiken offering once up close--and that was nearly two decades ago; but even then I remember being partial to the Horizon version.

So. . . the project is a GO! This is slated for 2010--or beyond, so there is no immediacy. But keep an eye out for updates, as I will be cleaning and prepping the pieces as time and inclination permit [note: torso, legs, and head have already been cleaned :-)]. . .

24 July 2009

Frankenstein (Son of) Monster GEOmetric FF--or--Cleaning-up a vinyl kit

I spent yesterday evening "cleaning-up" the kit. What does "cleaning-up" a vinyl kit actually entail? Well, that depends on the modeler and the kit.

RE: THE KIT. As I indicated in the initial posting, this (my sample) is one of the best vinyl kits I have ever seen! I know that not a few of those who came before complained about the over-engineered hands, but this is a none-issue AFAIC. Total air bubbles could be counted on two hands--with fingers left over: this is no small feat, especially with the relatively "light-weight" vinyl used by GEOmetric.

"CLEAN-UP" À LA AUGIE. Clean-up for me begins with a thorough inspection of the kit. This includes a parts count and checking for any miscasts. With a vinyl kit, one should also check for distorted pieces. Note that a distorted piece is not a miscast! Distorted pieces can usually be restored by placing in hot water or applying heated air from a hair dryer: vinyl, much like resin, has "original memory" and will usually revert to its original conformation with judiciously applied heat. Finally, I do a preliminary inspection for air bubbles.

Assuming all is as it should be, the next step is to remove the pour cones, wholly or in part. The standard practice is to heat (air or water) the area to be removed, and then carefully removing it with a fresh X-acto blade. Not for me. I slap a fibreglass cutting-wheel into the Dremel, and go to town. I might have some minor fine-tuning remaining to be done with an X-acto blade, but I can usually get the kit 98% clean with the cutting wheel.

Now comes the "fun" part. Once all my pieces are "de-coned", I fill them with PUR, in this case standard Alumilite. I can usually do two 1/8th scale kits with a a 28 oz. set. Some people might argue that it's expensive, wasteful, and makes the kit too heavy (?????); but the simplicity and effectiveness of this approach is unbeatable.

Once this is done, I will then dry-fit all the pieces, tweaking and adjusting the fit as required, and opening all remaining air bubbles--these will be filled during assembly. At this point all that is left to do is wash all the pieces in warm soapy water, and setting them aside to dry . . .

21 July 2009

"The Wolf Man"--Wrap-Up (3)

With the new Karloff head behind me, and with the Mummy at a good stopping point, it's time to get back to The Wolf Man. . .

I made very good progress over the weekend as the overall finishing is now beyond the halfway mark. I've begun to detail the shirt (seams, button holes, stitching, etc.), and the trousers are not far behind.

My main progress since resuming the project has been on the hands. After going back and forth, I decided I would rework both hands--as opposed to doing one, casting it, and transplanting fingers. The left hand has been 100% roughed-in, and the right will be roughed-in before the weekend. The hands will be completed and permanently attached before the figure gets primed.

The only aspect of the project that has yet to be worked upon is the trap. The research is done, and the design is just about there, but I've yet to begin cutting and bending.

Back to the bench. . .

16 July 2009

Moebius' The Mummy: An IP shot

Thought I'd share a close-up of The Mummy with its new [resin] head. . .

The head has yet to be permanently attached. The green arrow on the right points to the edge of the ground-in panel (still very much a work in progress) that will eventually serve as the marquee for the hieroglyphs.

Back to the grind. . .

A~

PS--By way of follow-up, the neck join has now been filled and finished, and the replacement head snaps on/off as if it were part of the original design.

15 July 2009

Frankenstein (Son of) Monster GEOmetric FF

Having recently rediscovered the Son of Frankenstein, the third part of the Karloff/Universal Frankenstein trilogy, I was quickly reminded of the iconic nature of this incarnation of the Monster--as well as why Gene Wilder and Mel Brooks used this film as the cornerstone for the classic Young Frankenstein!

In any case, last week I was lucky enough to stumble upon a venerable classic in its own right: GEOmetric's 1/8 scale "Son of Frankenstein"--in vinyl! This kit was superbly sculpted by William Paquet, and IMO epitomizes the art of vinyl kit production.

I had great plans for this kit, when much to my [pleasant] surprise they were dashed! You see, I had visions of scratchbuilding the prosthetic right arm of Inspector Krogh, etc. etc. etc., when lo and behold, it is included in the kit!!!

Equally as surprising is that this iconic accessory is rarely seen in/on write-ups and/or build-ups of this kit. Certainly it can not be considered too gruesome? Or potentially offensive?? This is definitely a head-scratcher. . .

This kit is targeted for next year some time, though preliminary clean-up and staging (anyone who has ever worked a vinyl kit knows of what I speak) will begin soon . . .

A~

13 July 2009

Moebius' The Mummy: Reworking the Head--Conclusion

I give you Im-ho-tep’s new head. . .


On the left is the stock head, which IMO bears a stronger resemblance to Rondo Hatton than Karloff. As you might recall, I removed the back side of the head from the dorsal body half with a jeweler's saw, and assembled the head as a stand-alone unit. The head was then filled with polyurethane resin (PUR), and pegged with 1/8" tin solder.

The head on the right is my resculpt--and I am VERY pleased. There might be some very minor tweaking still to be done before it is primed, but for all intents and purpose, it is done.

Given Karloff’s trademark features, this is not a difficult undertaking once one accepts how much of the underlying plastic needs to be removed before reworking the facial landscape can begin.

PS--The head is now in rubber, and I will hopefully have a first pour by Wednesday.

04 July 2009

The Mummy--Step 3: The Sarcophagus

With Im-ho-tep essentially done, I figured I might as well start on the largest element of this self-contained diorama: the sarcophagus.

It is hard to say whether or not this was over-engineered; what I can say without reservation is that an extra hand (or two) would not have gone amiss; and the fit is less than precise.

The sarcophagus is comprised of three sub-assemblies, totaling 12 pieces: the lid (2pcs), the coffin exterior (5pcs), and the coffin interior (5pcs).

Everything goes together fairly well, though as mentioned above, assembly would have been much easier with either an extra set of hands; an assembly jig; or had the parts been designed to be joined with greater precision. As it is, one is practically forced to use superglue in the assembly, and some filling will be required.

All the sub-assemblies have been assembled, and I am in the process of puttying and finishing the coffin interior. Once that is done, I will permanently join the two components of the coffin and begin final finishing.

More to follow. . .

05.07.2009

The sarcophagus is now fully assembled. I am now reinforcing joins and tweaking the fills. . .

08.07.2009

Finishing work has commenced in earnest on the sarcophagus. All the joins have been filled, and the sanding-and-fitting is about 90% complete. I have also leveled the mummy's "pedestal" so that the feet are squarely planted in the coffin. There's quite a bit of "clean-up" to be done, prepping if you will, that should make life infinitely easier once the paint starts going on. I'm shooting to have this one ready to move to the painting bench in 4 weeks, give or take. . .

25 June 2009

The Mummy--Step 2: The Mummy Grows. . .

The next step--and the last major deviation from the stock kit--is "adjusting" the proportions.

This type of reconstruction is never "easy", irrespective of medium, subject, or scale. One should never dive into this blithely, and the old saw of "measure twice, cut once", is especially apropos. In this instance, it wasn't so much the cutting, as where to cut. After repeated measurings--head-to-toe and vice-versa--I determined that the indicated place to section the legs was slightly below mid-thigh, just past the locating hole for the loose wrapping (see green-tinted area in image in Step 1). This was done with a fibreglass-reinforced cutting wheel on a Dremel: remember that I am cutting through not only the polystyrene "shell", but the PUR core.

Once sectioned, I proceeded to drill a 1/8" d. hole into either section and then inserted a tin-solder spacer, effectively increasing the length of the femurs. Assuring myself of the new proportions and adjusting the pose ever so slightly, I then packed the gap with MS. Filling the space is a minimum two-step process: pack the gap and lock the pose; and then finish the surface in successive steps. One down. . .

Finally, I removed all traces of what passes for the scarab ring. The relief is perfunctory and the detail sketchy at best. With the remaining MS I carefully created a slightly oversized "blank" that will be sized and carved in the days to come.

More to follow. . .

23 June 2009

The Mummy--Step 1: Solving the Riddle of the Mummy. . .

With the head now well on its way, and knowing that I was nowhere near a stopping point, it was time to consider my next step.

The coffin is not a very good candidate, as this is a project-within-a-project. . . or is it the other way around? So that leaves me with the mummy itself, and the issue of arm lengths vs. proportions.

The respective arm lengths are correct. The problem lies in the fact that the figure is but 7 heads tall--BUT the proportions are for that of at least a 7 1/2 heads-tall figure! Again, I don't know if there was intermediary shrinkage during pre-production; or production shrinkage. And it is irrelevant: the body is at least a half-head too short, and it is up to the end-user to determine if it is worth correcting or not. Obviously, you know which path I will take.

The first step is to assemble the mummy's body. The fit is excellent and very "positive" (thanks to medial "locking pegs" down the length of the body halves), and assembly of the four components was accomplished in no time. . .The assembled body--minus arms, head and stray wrappings--was filled ~3/4 full with PUR (100cc).


Above you see the assembled body with the scaling grid "Sharpie"'d in, and the Phase II head tentatively positioned on a length of tin solder. By way of follow-up, the arms have been assembled and positioned, with MS used as a filler in the small space between the arms and the torso.

21 June 2009

Erik, the Opera Ghost--Act I: [Curtain]

The head is finally done. . .


Or as done as it is going to get at this time. There is still some minor clean-up, tweaking, and detailing left to be done, but I will leave that for when I begin to work on the project in earnest.

Now it's on to Karloff and back to the Wolf Man. . .

20 June 2009

Moebius' The Mummy: Reworking the Head

With the Phantom's head all but done, I was ready to resume the finishing on the Wolf Man. . . that is, until I began examining Moebius' latest in the course of preparing the review. As I indicated:
". . . it is not a very good likeness of Karloff--and the ears are HUGE!"
I am not sufficiently familiar with the process of injection molding to speculate if the head-as-provided was a product of distortion that occurred during production; nevertheless, that would be the best way to describe what is before us.


The dorsal (back) half of the head was molded en suite with the body: the first step was to separate it with a jeweler's saw. I then glued the head halves together, and once dry, filled the head with PUR.

The right side of the head is now about 80% done; the left side has barely been touched to provide a comparative view. Note the "original" ear on the latter! I have also reduced the back of the head by about 20% to correct a noticeable parieto-occipital distortion: while cranial deformation was practiced in Ancient Egypt, this was not an aspect of the Pierce makeover.

Check back often for updates to this mini-project. . .

19 June 2009

Moebius' The Mummy


This is the dazzling Basil Gogos boxart for Moebius' latest addition to the dungeon of 1/8th scale polystyrene Universal monsters. While undoubtedly one of the finest releases ever in this genre and medium, is it everything we could have hoped for?

The first thing that strikes you--after the artwork, of course--is the size of the box: it is a whopping 12.5 x 9.75 x 5.25 ins.! Inside you will find 43 pieces cast in pale-grey polystyrene. VG+ casting throughout, with zero flash (yes, it is a new kit and flash should not be an issue; but unfortunately we all know better) and minimal "fade". This is most noticeable on the ears, but more on this later... Rounding off the impressive contents is a 4pp, 4-color refsheet by Jeff Bond and Dave Metzner. TOP NOTCH!

The design of the sculpture is very reminiscent of Janus's l-o-n-g OOP Im-ho-tep and Sideshow's Premium Format "The Mummy and Sarcophagus" offerings. The one telling difference is the price. . . and the fact that this is is readily available!

PLUSES:
1) Excellent styrene! I have taken Dremel and blade to it, and it responds beautifully! You won't be able to ramp up the rpm's--any more than you could on any styrene--but it is hardier than most. Quick response to liquid cement--in most instances, you shouldn't need to resort to clamps, tape, or rubber bands: hold for a few minutes, finalize the position, and set aside.

2) EXCELLENT fit with "positive lock" on many of the major subassemblies. There will be some filler work required, but compared to most "large-scale" styrene figure kits, this one can be described as "filler free".

3) SUPERB engineering/design! I was somewhat apprehensive over how the kit would be broken down, especially as I have "plans" which would have been easily derailed if the kit had been engineered otherwise. No worries whatsoever! The kit is designed to allow us, the modeller, to take it as far as our abilities and imagination will permit.

MINUSES:
Really only one. Unfortunately, it (collectively, they) all involve the titular subject. First of all, it is not a very good likeness of Karloff (I appear to be in the distinct minority in this, as most reviews have raved about the likeness. . . go figure)--and the ears are HUGE! I have already commenced the re-modelling of the head, and I will post images shortly to illustrate. Secondly the proportions are off: either the overall length of the body is too short; and/or the arms are too long. Something will have to be done to eliminate, or at least mitigate, the knuckle-dragging look, and hopefully allow the mummy to fill out the coffin a bit more.

This is a MUST HAVE kit! If it is your first monster model, you're in for a treat! If you're an old 'Monster Kid' who remembers the days when you could pick up an Aurora kit for 8 bits, this will take you back to those halcyon days with none of the downsides.

Augie

10 June 2009

The week of 6/7. . .

1) The Phantom head--Phase III, posted below, has been further refined and enhanced with every component, including the hair (!), either finished or well in-progress. [UPDATE: save for a few enhancements, tweaks, and [relatively] minor points of detail, which are being worked upon assiduously, the head is DONE!]

2) After much thought and deliberation, ordered and received the Image Entertainment edition of the Phantom of the Opera. A definite improvement over my decades old VHS copy!

3) Ordered Moebius's new kit of The Mummy, arguably the most exciting new injection-molded kit of the UMs in over 25 years!

PS--Item received today (18/06/09). In a word. . . AWESOME!!!!!!

4) Ordered and received Philippe Faraut's eagerly anticipated follow-up volume to Portrait Sculpting: Anatomy & Expression in Clay: Mastering Portraiture: Advanced Analyses of the Face Sculpted in Clay.

5) Ordered PL's Headless Horseman from Burton's Sleepy Hollow. This is obviously a long-OP kit, and based on everything I have seen and read, not a particularly good one. . . but what can I say: I love the subject matter; enjoyed the movie immensely; and the kit is not likely to be reissued/redone.

PS--Item received today (17/06/09). My example was cast in the off-white polystyrene (same as The Wolf Man and Phantom)--I have read in reviews, etc. that some [early?] runs were produced in ABS? If the Phantom is a long-term project, this is a lifetime project! MUCH work to be done . . .

6) Finally, Doyusha has released a 1/4 scale kit of Naoe Kanetsugu's "Love" kabuto. This is the first new addition to their helmet line since I don't know when. . . and hopefully not the last! It is on order.

PS--Item received today (26/06/09). Arguably the best in the series, though I would be hesitant to argue the point too stridently. This might not be my favourite of the Sengoku kabuto, but it is undeniably one of the most interesting. MUST HAVE!

This ought to keep me busy for a while. . .

02 June 2009

"The Monster 1931"--INTRO

Thanks to the help of a colleague and fellow UMA and Clubhouse member, my Grailquest for Mike Hill's 1/4th scale bust of the Frankenstein Monster (1931) was successfully concluded this week.

IMHO, this is the best rendition of the Monster in the "smaller" scales. Exquisitely cast in 3 pieces (plus 3 pieces for the base--base, nameplate, and a length of clear lexan rod) by Earthbound Studios, and released by Forbidden Zone, this is some of the finest casting I have ever seen(!): ZERO bubbles; no seam lines to speak of, save for a slight shift at the sprue mouth; and the finest resin I have ever encountered.

While I had some difficulty in locating and acquiring the kit, it is still available via Forbidden Zone. Though some patience will be required, it will be worth it!

30 May 2009

Erik, the Opera Ghost--Libretti

In addition to the film itself (various editions and formats) and a modest selection of stills, I have turned to these published works for additional background, insight and inspiration:

Kay, Susan. Phantom. NY: Delacorte Press, 1991.

Riley, Philip J. The Making of The Phantom of the Opera (Classic Silents, vol. 1). Absecon, NJ: MagicImage Fimbooks, 1999.

Wolf, Leonard, ed. The Essential Phantom of the Opera. NY: Plume, 1996.

26 May 2009

Erik, the Opera Ghost--Act I: The Face/Head

Erik. . . the Opera Ghost. . . the Phantom of the Opera. . . call him what you will. Though Claude Rains (Universal 1943 remake), Herbert Lom (Hammer 1962), Michael Crawford (stage), and [countless?] others have breathed life into this iconic character, Lon Chaney, Sr. undeniably made Erik his own. To paraphrase his son, the Phantom was his baby.

Or should that be babies? I have recently discovered how challenging it can be to sculpt a credible likeness of the Opera Ghost. Unlike other subjects, primary and secondary references abound: from movie stills to excellent 3-d likenesses--sculpture, masks, etc. Yet while they are all recognizable as the Phantom, they can all be noticeably, even significantly, different. So I will rephrase my original question. "Can there be a definitive likeness of Chaney's Phantom?"

The answer is, "Yes". . . and decidedly, "No!" Few will argue that Chaney was a master of his craft elevating it to an art form. But only upon researching this silent classic was the genius unveiled. Very simply put, there can be no definitive Phantom because the Phantom was not only a multitude of ad hoc expressions, but most importantly an illusion--truly an apparition!--created by variegated makeup and lighting. One can give form to what we see, but we have to accept that the image captured in putty or clay probably never truly existed!

I now present the Phase II head with the the facial reconstruction at a still [somewhat] crude, semi-finished-but-still-rough stage. While I have sculpted the lower teeth in situ, the maxillary dentition has been sculpted as a separate appliance [NOTE: the separate appliance has now been permanently attached and the upper lip slightly extended.].

I am not quite there yet, but it is gradually emerging. . .


30.05.2009

I am now well into Phase III, and I am comfortable saying that I am fast upon the home stretch. There is still some tweaking to be done, but the overall "lines" are now present, and I think that once the hair and eyes are done, it will all come together splendidly.

31.05.2009

The left eye (orb, lids, etc.) is all but done; the right eye has been modelled and awaiting the lids, etc. I should have a final--or near-final--image to show you by this time next week. Then the wretched Erik will be returned to his box to await his turn on the bench. . . The performance will in all likelihood resume with Act II sometime next year.

03.06.2009

I am so pleased with the way the headsculpt is turning out that I am considering exploring what options might be available to me to broaden its "distribution". It would certainly be an 1/8th scale bust--yes, I have a particular depiction in mind. Once the head is completely done, my next step will be to contact Chaney Entertainment: I would not pursue this without their blessing and permission. Stay tuned!

06.06.2009

The Phase III head. . .


The headsculpt is now all-but-done. Clean-up has begun in earnest, and I should have no more than an hour or two of work remaining before the face is completed. I am as of yet undecided whether to cut an intermediate mold at this point; or proceed with the hair. . .

12.06.2009

Just about there. . . There was something not quite right with the mandible and chin that, in spite of the fact that a significant degree of any Phantom likeness will be brought about by the paint job. I think I've "fixed" the problem and I'll certainly know by this time tomorrow. In any event, my goal is to have this completed--and hopefully in rubber!--by the end of the weekend.

25 May 2009

Erik, the Opera Ghost--Divertimento?

Not hardly. . . but this may certainly mark a transition in the first Act. . .

While the project on the whole is unfolding splendidly, I have just about resigned myself to doing away with the mantle. As I've oft mentioned in previous postings, I am by no means an Aurora purist, and the one glaring weakness of any Aurora/Aurora-like release has been the drapery. The greater the volume of fabric, the greater the eyesore.

I was prepared to rework the drapery to some degree or another. In fact, a not-insignificant amount of time and effort was spent reinforcing those areas where a 'breakthrough' would be most likely to occur. However, after spending some 3 hours attempting to situate the mantle, it became clear to me that there was no way that the mantle as designed and cast could be successfully integrated with the kit. A good deal of the problem lies with the sculptor's apparent lack of familiarity with the period opera cloak/mantle--though I will hasten to concede that the limitations of the casting process most likely played a significant role in the more glaring shortcomings.

Is this my final word? No. . . not quite. I will have to spend some time watching the original and closely examining the stills at my disposal before I make my final decision. In the meantime, I will continue working on the head, shirt and cravat. . . and begin considering sculpting a dressing gown on our tormented "ghost".

24 May 2009

Erik, the Opera Ghost--Act I

Still not feeling quite at 100%, but well enough to venture a bit farther afield than I did yesterday. . .

All subassemblies--head, torso, legs, shoes and cloak/mantle--were assembled, and filled with PUR where applicable.


In the first image, you can see what I've done with the head and torso to date. The torso is about 80% blank. As the mantle does not fit anywhere near as snugly as it should, the torso will have to be built-out: lapels, etc. I have already begun to build out the shirt: this was largely driven by the fact that the cravat was some 4 scale inches below the neckline with no visible means of attachment. Also the shirt was collarless! You can see the roughed-in-standing collar in the image above; as well as the beginning of the right lapel. Finally, I hollowed out a neck opening which will receive the head.

I wish I had taken a photograph of the stock head. For those who would like to get a general idea of what the stock head looked like, you can go to this site. In any case, the only changes I have made to date are: ground-out the eyes and mouth; added 2-3 mm (MS) to the top of the head (if you look closely at the surviving stills, it can be clearly seen that Chaney applied a wig/skullcap that effectively extended the length of his forehead), and ground-off the hair to reshape the calvarium; and added a neck stump (MS). I have begun to tentatively reshape the head and some of the features (e.g., nose), but this is very much in the preliminary stages.

Ironically, for all the head's shortcomings, once a little bit of work is done on it, it begins to take on a startling likeness to Chaney sans makeup! This is rather exciting as now the modeller gets to play Chaney, if only for a little while. . .

And now for the infamous mantle. . . As you can see on the left half of the image, the front right panel is engineered in two pieces. All of the horror stories re: this kit revolve around benighted engineering-- and I would agree 100%. Most if not all of the build-ups I have read about have the modeller assemble the mantle in situ: my hat is off to these gentlemen as that would be a deal-breaker for me if there weren't an alternative.


The mantle can obviously be assembled as a stand alone unit. I assembled mine with liquid cement, and then reinforced all seams with superglue; allowing the entire assembly to set and cure overnight.

The trick now is how to locate the torso inside the mantle. First, one must remove the locating pegs molded on the back half of the cloak that attach this piece to the back half of the torso. Next, one must remove all the extraneous lugs, numbering "plates", etc. that populate the inner surfaces of the pieces comprising the mantle. Once that is done, one can cajole the torso past the waist of the mantle until it pops into the chest area. This is not as difficult as it sounds. Kudos to PL for providing us with a one-piece back half: the entire mantle can be gently pried apart until the torso pops into place.

I will have several options by which to secure the mantle to the torso: at this point I am still undecided as to which will work the best for me.

More to follow. . .

A Star for Jack Pierce on the Walk of Fame

I'm usually not one for this type of thing, but I believe an exception can--and should!--be made in this case.

I would direct your attention to the following thread in the UMA forum:

http://www.universalmonsterarmy.com/forum/index.php?topic=1319.0

If you would like to cut straight to the chase, the on-line petition can be found here:

http://www.petitiononline.com/jppierce/petition.html

23 signatures in three days. . . LET'S MAKE THIS HAPPEN!

Heartfelt thanks in advance,

Augie

24.05.2009, 1552

2990. . . 10 to go!

24.05.2009, 1905

4 to go!

24.05.2009, 2120

3000!!! Thanks to all who voted. And if you haven't, please do! The more votes, the better the chances that this will become a fait acommpli!

23 May 2009

Erik, the Opera Ghost--Ouverture

I underwent a root canal on Thursday, and while the procedure was remarkably pain-free, the aftermath has been somewhat uncomfortable and draining; in other words, I was in no condition to engage in precision, delicate work. But as I am not one to squander an otherwise perfectly good opportunity to get some work done by laying about trying to guess when the next wave of pain would hit, I decided to break into a kit that I've had for nearly a decade.

Back in the day, Polar Lights released some remarkable kits. First and foremost, in this modeller's opinion, was their Phantom of the Opera. This wasn't a re-pop of the venerable Aurora release, but an entirely new tooling (#5027) that included the organ! This kit was a self-contained diorama the likes of which had never been seen in the styrene world!! (Perhaps a bit of an overstatement, but not by much. . . )


PLUSES:
1) Excellent styrene! Immediately responsive to liquid cement, albeit somewhat softer than I'd like. [NOTE: Care should be taken when using "hotter" putties/fillers (incl. RGP): apply and build-up using thin layers; DO NOT use liquid cement as a thinner; and let dry at least 24 hrs. before working the surface!]
2) Positive lock fit. This is as close to a snap-together kit as I have ever seen! By way of illustration, the organ has been assembled without a single drop of cement and without benefit of blue-tack.


MINUSES:
1) Engineering of the subject figure leaves much to be desired. The bane of this figure is the two-part right front panel of the "cloak".
2) Sculpting shortcuts and simply poor sculpture and design abound (e.g., the cravat, the head (horrible likeness! And not in a "good" sense!!), the shoes, the jacket, etc.).

To summarize, this figure is a modeller's figure--an advanced modeller's figure. This is not a weekend project if you want to realize all this figure has to offer. Fortunately, I'm in no hurry. . .

16 May 2009

"The Creature from the Black Lagoon"

Recently received Monogram's [ex-Aurora] "Creature from the Black Lagoon", thus completing my "to-get" list of Monster 'oldies but goodies'.

While this is one of the best-fitting of the Aurora monsters, it is also one of the toughest to finish due to the fading detail at the seam edges of the scales, and the attendant restoration work it demands (the relatively soft--or brittle (Aurora)--plastic doesn't help). There is also the question of the veracity of the likeness: I plan to rework the head; but to what extent is unclear as of this writing (NOTE: I have already removed the teeth and started reworking the lips).

The kit itself is well-done, but rather uninspiring: basically, it is the Aurora Wolf Man with gills and scales. Some six or seven years ago, Jimmy Flintstone in his Dr. Flintbone line released the "Creature Conversion Kit", and this is just the aftermarket kit to breathe some much needed life into this venerable classic.

The conversion kit is comprised of seven pieces: a replacement base; (2) replacement arms for the Gillman; and a 4-pcs kit of an unconscious bathing beauty representing Julia Adams in the role of Kay Lawrence (NOTE: This vignette was based on Universal publicity stills: the Gillman never held Kay in her bathing suit. I intend to rework Ms. Adams' costume to not only represent the scene in the movie, but introduce a greater variety of colour.).

I first experienced JF's products well over a decade ago, and while scoring high for creativity and selection, their production quality left MUCH to be desired. That was then. I will admit to a fair degree of trepidation when I ordered this kit, soon to be replaced by great trepidation as I opened the sturdy self-folding box. . . All for naught! JF's casting quality has improved dramatically! He is now using a superior grade of resin, and that has minimized many of the typical problems we used to expect from him. The only flaws are a significant mold shift on the left side of the face that exacerbates the lateral compression of the mold (since I intend to personalize the face to a hopefully better likeness of Julia Adams, this matters little); two small (emphasis on small) areas of trapped air bubbles and a somewhat unfinished surface quality. All in all, this is a solid B+ effort, and I wouldn't hesitate to recommend this kit with the attendant caveats.

That's about it for now. This will be one of two Creature projects on the "to-do" list for 2010 and beyond. And they might be joined by a third: there is a[n unsubstantiated] buzz that Moebius might be releasing an all new Gillman kit down the line. . .

17.05.2009

The facial reconstruction of Ms. Adams has begun! The face and the attendant features have been widened, the ears relocated, and the hair- and jawline redefined. Not quite there yet, but off to a good start. . .

PS--The right side of the face is now essentially done, with but the fine finishing remaining. The left side of the face is ~65% done. VERY pleased. . .

19.05.2009

The face is now all but done. I have begun working on the ears and tentatively reducing and redoing the hair. I'm just about at the point where I can deem this phase of the project completed, and I can put her away until I am ready to tackle the vignette in earnest. I'll try to post some images over the Holiday weekend. . .

10 May 2009

Site Navigation (2)

If you are a regular you will have noticed that I have taken to expanding a given posting using "diary entries" rather than creating a new posting. I believe this will not only enhance the continuity of the thread content, but it will avoid having to worm our way through countless "sound bites" that in and of themselves provide little.

The only downside is that the reader may not realize that postings are being updated and revised in such a manner--hence this posting. If you are following a particular thread and/or project, please check the titular posting often until the next posting in the thread appears. Or you can click on the subject heading in the site index, and review the contents at your leisure.

In any case, just because there are no "new" postings doesn't mean that there hasn't been any activity. And make sure to check the comments: while there are now 25 postings, there are 33 comments!

ENJOY!

Augie